how'd i do that??? | Digital Scrapbooking How To
i get a lot of requests to teach people how to Digital Scrap. I am by no means an expert. I just do what works for me.
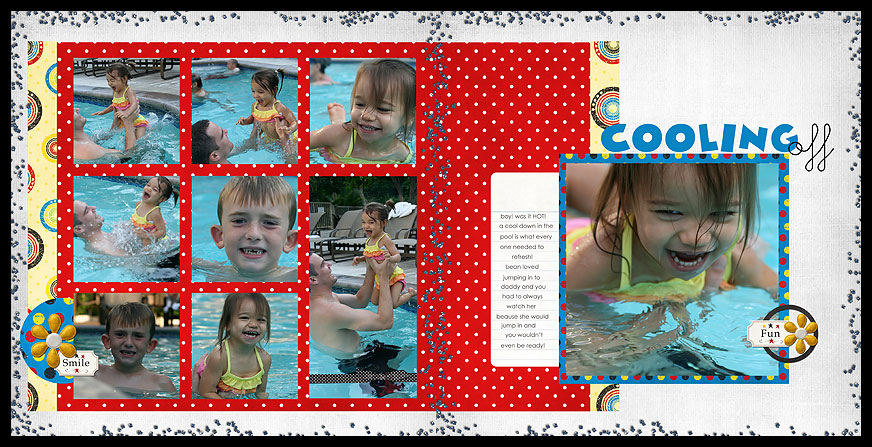
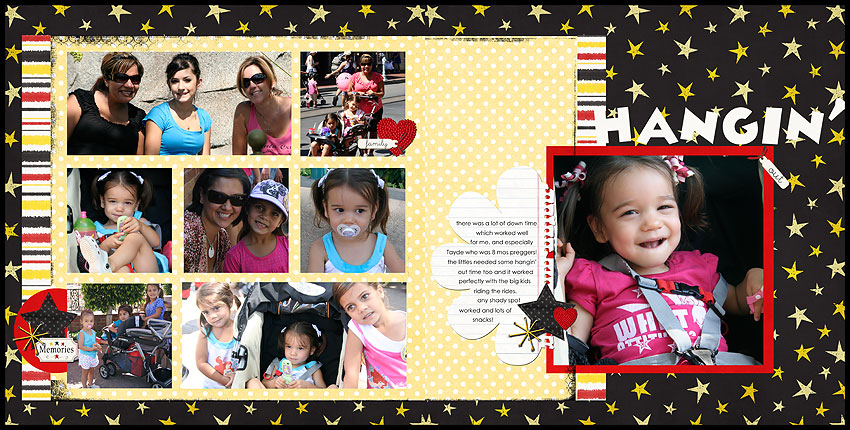
i am going to try to do a short tutorial of my Disneyland Digital album:
Ok, like I said, I was inspired by a paper layout I saw in CK's Jan 2010 issue by Annette Pixley.
So, I created a Digital Template in PSCS4 based on Annette's layout.
Open a new Photoshop document sized 12x12 300dpi.
Name it "DLdigitemplateLT"
You can see where I want my elements (patterned paper, embellishments, photos, etc.) to be placed.
I used the Rectangular Marquee Tool to create my boxes.
I repeat this step for the Right side of my 2 page spread.
and a look at the 2 page spread
I then choose the photos I want to use on the layout- 10 total and open them in PS.
I click on the square (cream colored in template) I want the photo to be placed in and then drag the photo onto the digital template.
on a MAC I push CMD-OPT-G ( i think it is CTRL-ALT-G on a PC) to fit the photo in the box.
Using the transform handles (little squares in each of the photo's corners) to resize the photo to fit into the box. Hold the SHIFT key while resizing to maintain the photo's size.
I repeat this until all 10 photo squares are filled.
I organize my digital goodies in Adobe Bridge. I tried ACDSee but since I use Bridge to organize my photos, i felt more comfortable using it for my digital scrapbooking.
I created a Folder named "DISNEY" and collected all the digital elements I thought I would like to use in my album.
like this: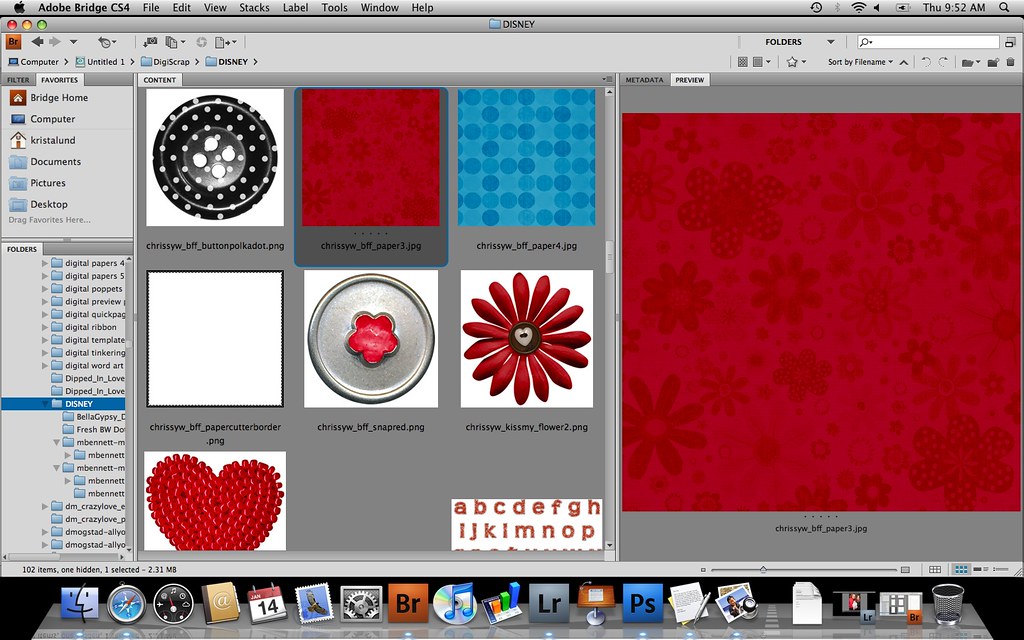
When I find an element, say Patterned Paper, I want to use, I open it in PS.
I click on the Layer in my digital template I want the patterned paper to be placed on. In this case, the Background and drag it onto my digital layout (just like I did with the photos). I hold down the SHIFT key while dragging it onto the template to center the paper.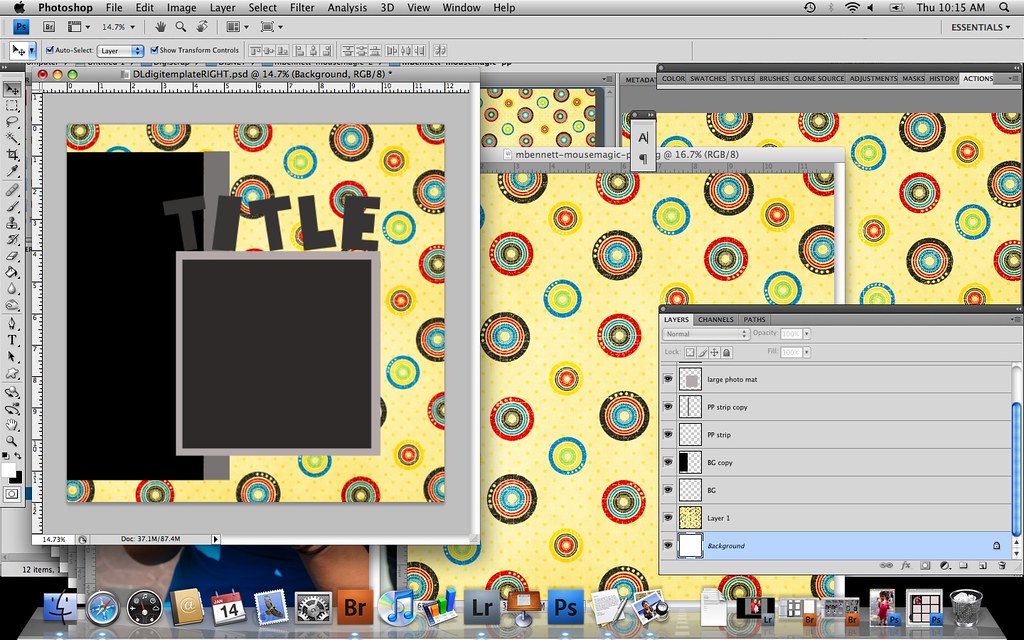
You can see in my Layers Palette on the right that my Background layer is selected so when I drag my patterned paper onto my digital layout it will land right on top of the Layer (Background) selected.
I repeat this step for all my elements (patterned paper, embellishments, etc.)
I change my Title using the Text tool.
I add a Journaling Block and other embellishments to finish the Layout.
To make your embellishments look more "real" I add a Drop Shadow.
To do this you select the Layer with one of your Embellishments. CTRL-click on a MAC (or Right Click on a PC).
Choose Blending Options from the flyout menu.
Click on Drop Shadow and make sure these settings are chosen: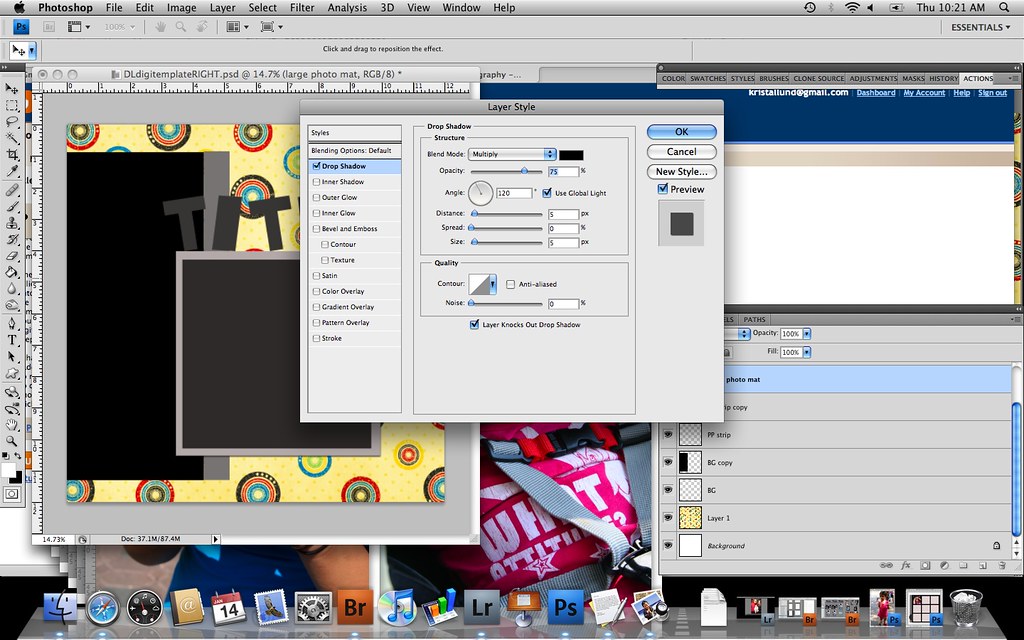
Before I know it, my two sides are complete!
I save both PSD and flattened Jpegs of both sides.
I then open a new PS document sized 12x24 300dpi.
Drag both sides of my layout onto the new document and line up.
Flatten Layers and Save for the Web so I can share it with you all :)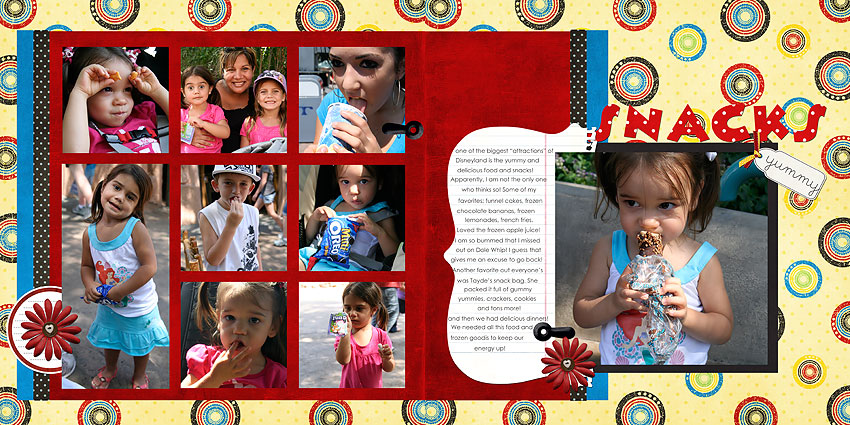
I said this was going to be quick...let me know if there are any questions.
Great Digital Scrapbooking Resources:
www.jessicasprague.com
www.designerdigitals.com
www.twopeasinabucket.com
Great Digital Templates at:
www.elementalscraps.com